
 hot topic
How To Build A PC On A 3D PC Building Website

Ready to build your perfect PC without the risk of breaking expensive physical parts? In this guide, you’ll discover exactly how to design, test, and refine a custom PC build using 3D PC building websites. You’ll walk away with a fully functional, compatible build plan you can bring to life with confidence.
How will this 3D building process change your PC building experience? These tools eliminate guesswork, help you avoid compatibility errors, and let you experiment with parts before spending any money. But it's important to understand the core benefits and clear steps to get the most out of these platforms.
Why Building a PC on 3D PC Building Websites Is Worth Your Time
- Zero risk of compatibility errors: The platform automatically checks if your chosen CPU, motherboard, GPU, and other parts work together, so you avoid costly mistakes when buying physical components. This takes the stress out of picking parts for first-time builders.
- Low learning curve for new builders: You don’t need prior PC building knowledge to use these tools, as most offer guided part recommendations and explain the role of each component as you go. This makes the hobby accessible to people of all skill levels.
- Unlimited creative customization: You can test every combination of case designs, RGB lighting, and part layouts to create a build that matches your aesthetic preferences and performance needs. You can even see how all parts fit together visually before you buy anything.
- Portfolio and planning value: You can save your completed 3D builds to share with friends, get feedback from the community, or use as a clear shopping list when you’re ready to purchase parts. This also helps you compare build costs across different part combinations easily.
- Transferable technical skills: As you experiment with different parts, you’ll learn how PC components interact, which translates directly to real-world PC building, troubleshooting, and upgrade skills. These are useful skills for anyone interested in tech as a hobby or career.
Step-by-Step Guide to Building a PC on a 3D PC Building Website
Step 1: Choose a reliable 3D PC building platform
Start by selecting a well-reviewed 3D building platform that fits your needs, with options that include real-time part pricing, compatibility checks, and full 3D visualization features. Popular options have large libraries of up-to-date parts from all major manufacturers, so you can find exactly what you’re looking for. You can create a free account on most platforms to save your builds as you work.
Common mistake to avoid: Don’t use outdated platforms that don’t update their part libraries regularly, as you may pick components that are no longer available or have inaccurate compatibility data.
Step 2: Define your build goals and budget
Before you start picking parts, decide what you primarily want to use the PC for, such as gaming, content creation, school work, or office use, and set a rough budget you want to stay within. This will help the platform filter appropriate part recommendations and prevent you from overspending on features you don’t need. You can always adjust your budget later as you explore different part options.
Pro tip: Allocate roughly 30-40% of your budget to your GPU if you’re building a gaming PC, or to your CPU if you’re building for video editing or 3D rendering work.
Step 3: Select your core components with compatibility checks
Start picking your core parts in order of priority: first your CPU, then your compatible motherboard, RAM, storage, GPU, power supply, and case. The platform will flag any compatibility issues as you select each part, such as a CPU that won’t fit your motherboard or a power supply with insufficient wattage. Take time to compare performance benchmarks and user reviews for each part before making a selection.
Common mistake to avoid: Don’t pick a case before you select your motherboard and GPU, as some larger parts won’t fit in smaller compact case designs.
Step 4: Assemble your build in the 3D workspace
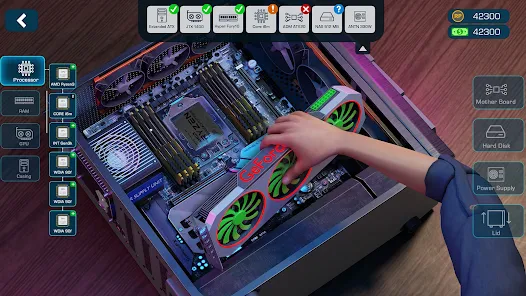
Once you have all your core parts selected, enter the platform’s 3D assembly mode to digitally put your PC together step by step, just like you would in real life. This lets you see exactly how each part fits into the case, check cable routing space, and make sure all components have enough airflow to stay cool during use. You can rotate and zoom the 3D view to inspect every angle of your build.
Pro tip: If you’re new to PC building, follow the platform’s guided assembly prompts to learn the correct order to install parts, which will make your physical build much easier later.
Step 5: Test performance and adjust your build as needed
Most 3D building platforms offer estimated performance benchmarks for popular games and software based on your selected parts. Review these metrics to see if your build meets your performance goals, and swap out parts if you need faster speeds or want to cut costs. You can also adjust your part selections to stay within your original budget without losing too much performance.
Common mistake to avoid: Don’t overspend on high-end parts that offer only small performance gains for your specific use case, as this will stretch your budget unnecessarily.
Step 6: Save and export your final build plan
When you’re happy with your 3D build, save it to your account and export the full parts list, which typically includes current pricing from different retailers, part model numbers, and direct purchase links. You can also generate a shareable link to send your build to friends or online communities to get feedback before you buy any parts. Many platforms also offer step-by-step physical build guides based on your exact part selections.
Pro tip: Check if the platform offers price alert features, so you can get notified when any of your selected parts go on sale to save extra money on your purchase.
Challenges to Be Aware Of
- Part availability and pricing discrepancies: The platform’s listed prices and stock status may not always match real-time retailer updates, so you may need to cross-check prices before making a purchase. You can mitigate this by setting price alerts and checking multiple retailer sites when you’re ready to buy parts.
- Learning curve for advanced features: If you want to use more complex features like custom water cooling or overclocking simulations, you may need to spend extra time learning how those tools work within the platform. Most platforms offer free tutorials for these advanced features if you want to expand your skills.
- Overwhelm from too many part options: New builders may feel overwhelmed by the thousands of available parts, especially if they don’t have clear performance goals. Start with the platform’s pre-made build templates for your use case, then adjust parts as you learn more about what you need.
Conclusion
You now have the foundation to start building custom PCs on 3D PC building websites, even if you have no prior experience with PC components. These tools remove most of the risk and confusion from the PC building process, so you can design a build that fits your exact needs and budget.
3D PC building websites offer a low-pressure way to learn about PC hardware and experiment with different configurations for free. By mastering these tools, you’re positioning yourself to build a high-quality, compatible PC that meets all your performance needs without costly mistakes.
Don’t wait for the perfect moment. Start testing your first custom PC build on a 3D platform today. You’ll be surprised how quickly you pick up the skills to design the exact PC you’ve been wanting.
FAQ
How long does it take to complete a full 3D PC build?
For first-time users, a basic build usually takes between 1 and 2 hours to complete, including part research and 3D assembly. If you want to test multiple part combinations or use advanced features like custom water cooling, it may take 3 to 4 hours total. Take your time to explore different options, and don’t rush through the compatibility check step.
Do I need prior PC building knowledge to use these platforms?
You don’t need any prior PC building experience to use most 3D PC building websites, as most offer guided part recommendations and explain component roles as you go. Many platforms also have beginner tutorials that teach you the basics of PC hardware as you build. Start with pre-made build templates if you feel unsure, and adjust parts as you learn more.
What's the best way to make sure my 3D build is compatible with real parts?
First, rely on the platform’s built-in compatibility checker, which flags most common issues like mismatched CPU and motherboard sockets or insufficient power supply wattage. Cross-check your final parts list against official manufacturer specifications to confirm compatibility, and share your build with an experienced builder for a second opinion if you’re unsure. This extra step will help you avoid almost all common compatibility mistakes.
Can I share my 3D PC build with others to get feedback?
Nearly all 3D PC building platforms let you generate a shareable link to your completed build, which you can send to friends or post in PC building communities for feedback. Many communities have experienced builders who can suggest cost cuts or performance upgrades you may have missed. Sharing your build is a great way to learn and make your final design even better.

RECOMMEND ARTICLES
Most Read

How To Find And Play All Kinds Of Gugu Gaga Penguin Games

How To Get Every Legendary In Pokémon GO

How To Land A Part-Time Nursing Job In A Nursing Home: A Step-by-Step Guide

How To Get 99 Nights In The Forest Codes: A Complete Step-by-Step Guide

How To Get Free Roblox Skins In Roblox Safely